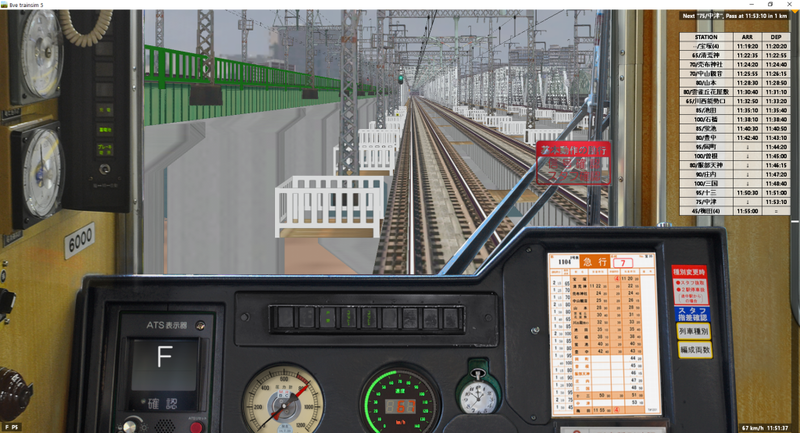
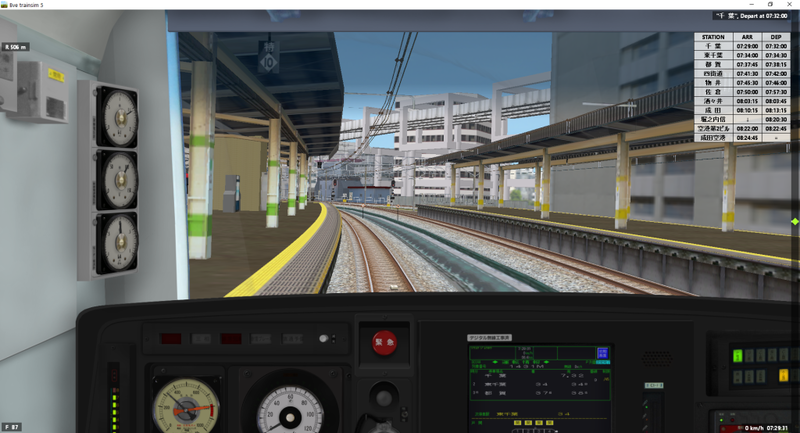
BVE Train Simulator 5/6: The Big English Guide On How To Use It, And Why
Boso View Express, or BVE for short, is one of those train simulators that have been around for a very long time but never quite managed to establish themselves at the top of the food chain, at least not here in the west. But if you want to simulate Japanese railways, BVE is essentially the holy grail.
You can find a huge variety of routes and vehicles, all of them with appropriate train protection and signalling systems courtesy of a highly-flexible plugin interface, for absolutely no money at all, but there is a downside: Basically the entire community is based in Japan, communicates in Japanese, and works on Japanese computers - which makes it difficult to get into the sim, or even to get it working, if you are not able to read and understand at least a bit of Japanese. (Google Translate, while definitely useful, often chokes on technical jargon.)
This guide aims to help you install the sim and addons, understand principles of how Japanese railways generally are operated and how they differ from what we Westerners would expect, and also point you to some up-to-date, high-quality add-ons.
A note on OpenBVE
BVE has a complicated version history. Back when the most up-to-date version was BVE 4, and its author, mackoy, had not updated it in quite a while, an open-source clone called OpenBVE was created, and continues to be updated to this day. A while later, mackoy released BVE 5. As far as I can tell, OpenBVE has been adopted by pretty much all Western add-on creators, whereas BVE 5 was adopted by pretty much all Japanese add-on creators. This guide will mostly ignore OpenBVE because it is already well-documented in English.
BVE 5 add-ons do not work with OpenBVE. OpenBVE addons do not work with BVE 5.
BVE 5 or 6?
Simple answer: Both.
Long answer: BVE 6's main advantage over BVE 5 is that it is 64-bit compatible. However, BVE 6 can not play BVE 5 add-ons, and because BVE 6 only was released a couple of months ago, there is very little content for it so far.
Luckily, you can just install both of them. You can use different folders for the add-ons (for example C:\Users\
Currently, all add-ons mentioned in this article are for BVE 5.
Installation
Installing the sim itself is easy, just download and install your preferred version from the official website: http://bvets.net/en/download/
You also need an up-to-date .NET runtime, which should already be installed on your machine per default.
On the same website, you can also find two short official routes, the Keisei-Chiba line and the JR Uchibo line. Some other add-ons use files from those two, so you should definitely download and install them. The Uchibo line's download page is mostly in Japanese but all you need to do is click the big yellow button labelled "Download".
Installing add-ons
BVE add-ons usually come packaged as a ZIP archive.
You might be tempted to just open ZIP files with Windows Explorer, but in that case you will run into some problems with file names. While Windows itself stores file names in Unicode (meaning that non-Latin characters generally do not cause problems), ZIP files don't, and they do not specify the correct encoding in their metadata. This means that, if you create a ZIP archive on a Japanese computer and then open it on an English computer, your file names will be mangled - and BVE will then be unable to find the files it needs.
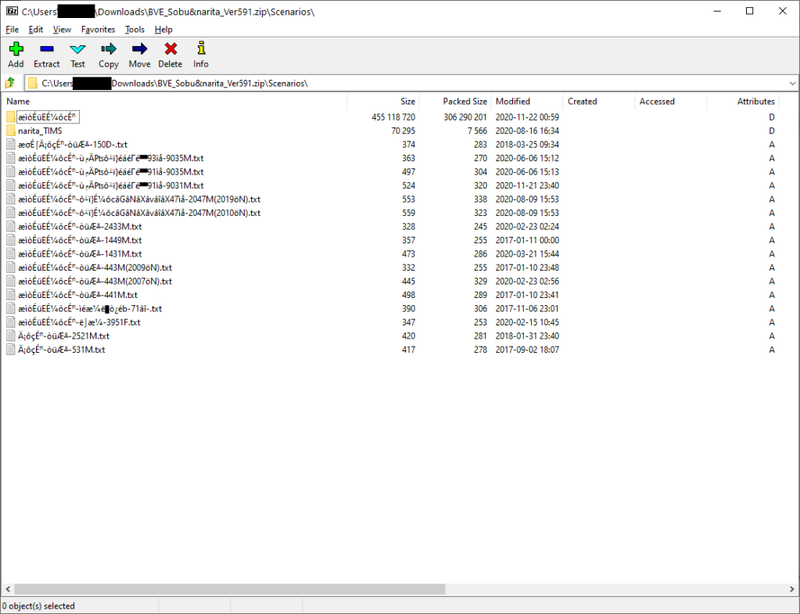 Not how file names are supposed to look like
There are two ways of overcoming this issue. One of them is " Locale Aware Unzip", a program I wrote myself for this exact problem. You can download and install it from here. Start the program, select the ZIP archive you wish to unpack, select an output directory (your Downloads directory is usually fine here), and select "Shift_JIS" as encoding.
The other way requires two pieces of software: The first is 7-zip, a powerful tool for opening archives. The other one is Locale Emulator. In order for this to work, you need to install the 32 bit version of 7-zip; Locale Emulator will not work with the 64 bit version.
Locale Emulator allows you to run individual programs with another system locale just by using the context menu. This is how to start 7-Zip in Japanese:
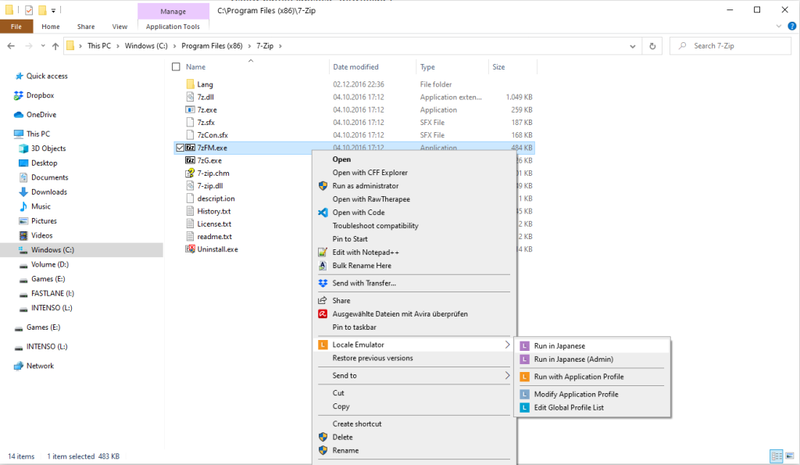 10 points if you spot the German
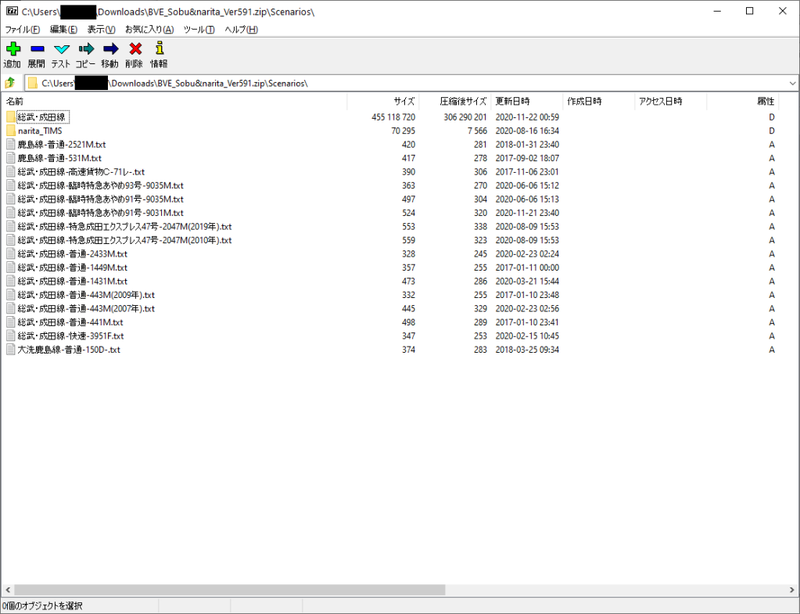 Properly-rendered Japanese characters
The downside is that the entire user interface for 7-zip is now also in Japanese, but you could just open another 7-zip window without Locale Emulator, and then use that for orientation. In practice, all you need is the blue "-" button ("Extract"), and then the "OK" button in the next dialog.
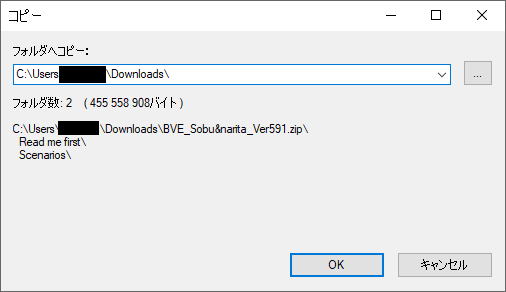 Translator's Note: "OK" means "OK". "キャンセル" means "Cancel". You could probably infer that from context.
After unpacking the archive, you just need to copy the content to the appropriate folder. If the archive contained a "Scenarios" folder, you need to merge that with C:\Users\
Note that many route add-ons require you to download appropriate trains separately, and install them following the same procedure.
If an add-on is packaged as an EXE (or a self-extracting archive), you usually do not need to use Locale Emulator.
Start driving
Now that we have installed the simulator and a route add-on, we can open the sim, select a train and get going. Here, I'll be using the Keisei-Chiba line, one of the two "official" routes mentioned above, as an example.
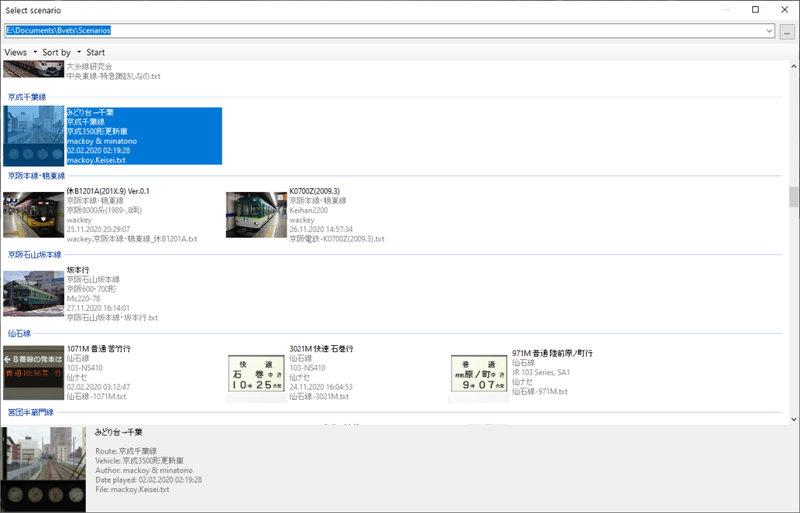 Note that I am not using the default location for my addons.
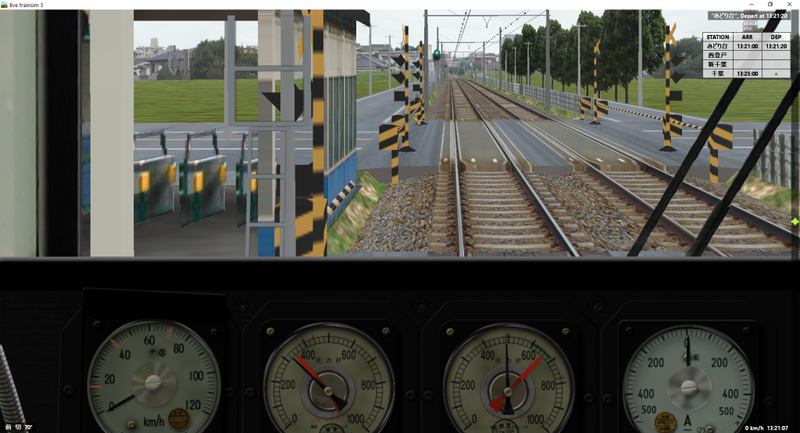 The Keisei-Chiba line just after starting the simulator
While the simulator itself is translated into English, most of the text specified by the vehicle and / or route, like the HUD parts in the lower left corner and the timetable in the upper right corner, are often in Japanese. Here are a couple of useful words and characters:
Reverser: 前 (forwards) - 切 (neutral) - 後 (backwards)
Throttle: 切 (off / neutral) - ノッチ1 (notch 1)
Brake: ゆるめ or ユルメ (released) - 非常 or 非常制動 (emergency brake)
Luckily, on the latter two, most vehicles just use P1, P2, ... for the power throttle and B1, B2, ... for the brake lever.
At the top of the window, there are instructions on what to do, which you can use to familiarize yourself with the key bindings. For reference, the ones you need to know are:
Q - A - Z for the power lever or combined power/brake lever. Q goes down a notch (decrease power or increase brake), Z goes up a notch (increase power or decrease brake), and A moves one notch towards the neutral position.
Comma and Period for the brake. Comma releases the brake by one notch, period applies one more notch.
Up-Arrow and Down-Arrow for the Reverser (up for "forward", down for "backward"). Note that, in order to switch the direction you have to press the appropriate button twice - the first press only gets you into neutral position.
On the Keisei-Chiba line, the train guard will notify you with two beeps once you're allowed to leave. On other routes, this might be a single beep, one or two chimes, or there may be one-man operation so you may depart as soon as the door light (usually green) turns on and the HUD assistant (top of the screen) tells you to depart.
When it is time to stop at the next station, the bar on the right side of the window shows you the stopping position on a +/- 10 meter scale. When the green diamond is right on the center line, you are at the perfect stop position. While the diamond still is green, your stopping position is correct. When it is yellow, you are not in a correct stopping position and you need to move the train in the appropriate direction.
Doors are generally not operated by the driver in BVE.
You can hide all the HUD assistants, by the way, but I recommend you leave them on at least for a while. They are very helpful.
Notes on DMUs and railcars
Many diesel vehicles have a semi-manual gearbox, requiring you two switch between a low gear (変) and a high gear (直). You can switch between them with PageUp (towards high gear) and PageDown (towards low gear). The three gears are usually arranged like this:
High gear (直) - Neutral (中) - Low gear (変)
This means you need to press PageUp twice when shifting from low gear to high gear.
There are usually some indicators in the cab showing the kanji listed above. Note that the clutch is operated automatically, and whenever you are standing still or coasting, the indicator for neutral gear (中) will be shown regardless of which gear you have actually selected.
Also, many railcars (and some locos) do not have a stepped / self-lapping brake valve. On these vehicles, you will generally find four notches on the brake lever:
Release (弛め込め) - Lap (重なり) - Apply (常用制動) - Emergency (非常制動)
You will be familiar with this setup if you have driven any of the early British railcars in Diesel Railcar Simulator, Train Simulator 20XX or Train Sim World. If you aren't, here's the gist of it:
- While the lever is in the "Release" position, air is gradually pumped into the brake pipe until the brake is fully released.
- While the lever is in the "Lap" position, pressure in the brake pipe is kept constant, keeping the brake at a similar level. (This does not mean the braking force will be constant!)
- While the lever is in the "Apply" position, air is gradually moved out of the brake pipe, applying more and more braking force.
- The "Emergency" position should be fairly obvious - all air is released out of the brake pipe almost immediately in order to stop as fast as possible.
When approaching a stop or a signal, you move the brake to the "Apply" position until you've reached an appropriate pressure in the brake pipe, then move it to the "Lap" position. From there on, you can regulate the brake by moving it to "Release" or "Apply" for a bit, then going back to the "Lap" position. While you're coasting or accelerating, the brake lever should be in "Release".
When leaving a stop, you should keep an eye on the brake pressure gauges, as the brakes will take a bit to fully release and applying power before the brake is released will increase wear and tear on the braking system and gearbox.
Japanese vehicles generally operate at a brake pipe pressure of 5 bar / 500 hPa.
Reading the timetable
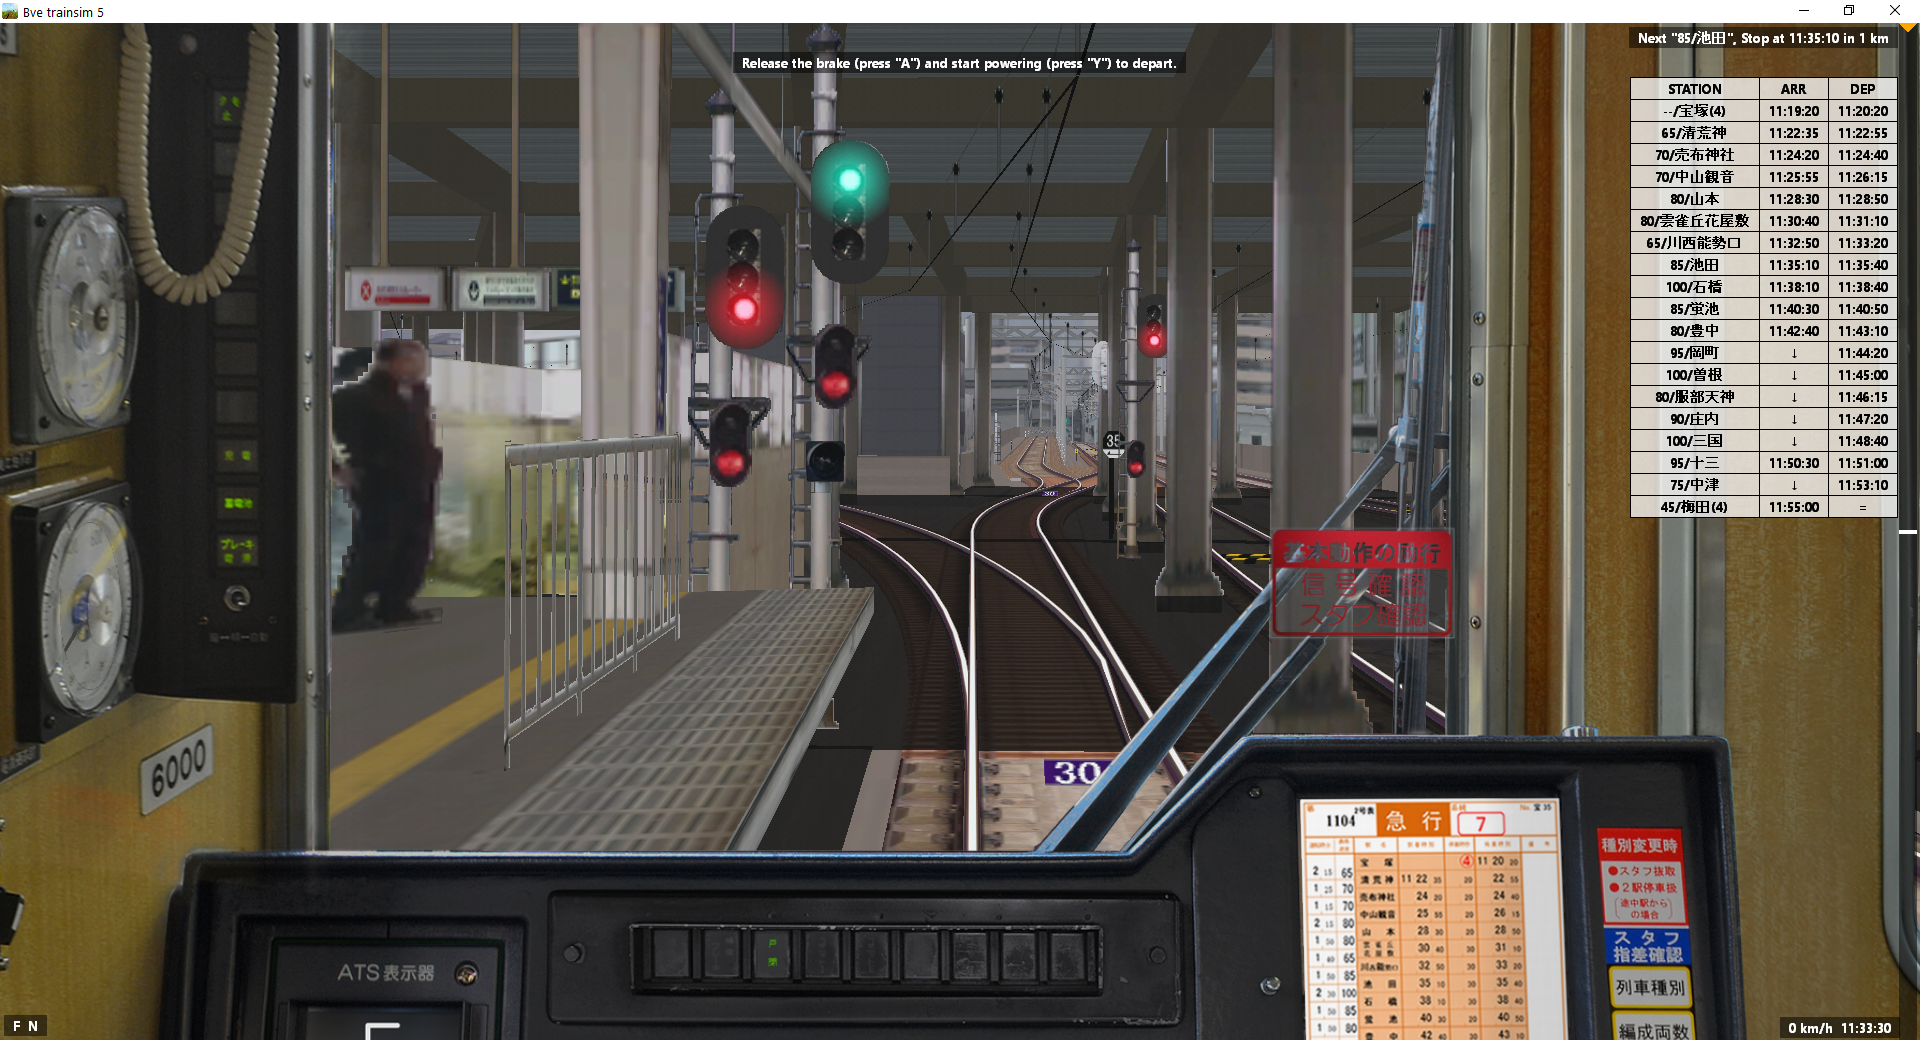
In this timetable, you might suspect that you only need to stop at the last stop (Chiba / 千葉) but you would be wrong. While the two other stops (Nishi-Nobuto and Shin-Chiba) do not have a set arrival and departure time, you are still required to stop! When you may pass a stop, it is marked with an arrow, as in this example from the Hankyū Takarazuka Line.
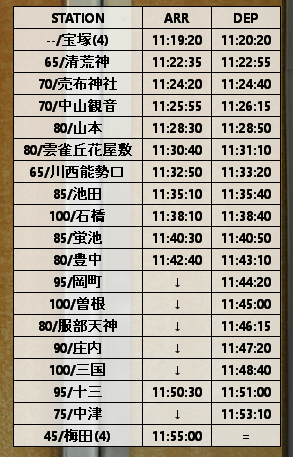 By the way, the numbers indicate recommended speed for the respective section. You'll only see this on a small handful of scenarios.
Basics of Japanese railway signals
Most Japanese routes use a signalling system with five different aspects, which always works more or less the same. Some other routes use a variety of cab signalling systems which we will get to in a later section.
The Keisei-Chiba line is an example of a route with regular signals.
This section is not meant to be exhaustive, as the details vary a lot between operators, and even between individual routes. It's intended as an overview; you can figure out the rest, and having some basic knowledge will also help you figure out the read-me files / manuals of individual add-ons after they've been mangled by Google Translate. If you want to read more, this Wikipedia article is a good start. If you know more in-depth sources, I'd be interested of hearing about them in the comments.
The five signal aspects in common use are shown in this handy image:
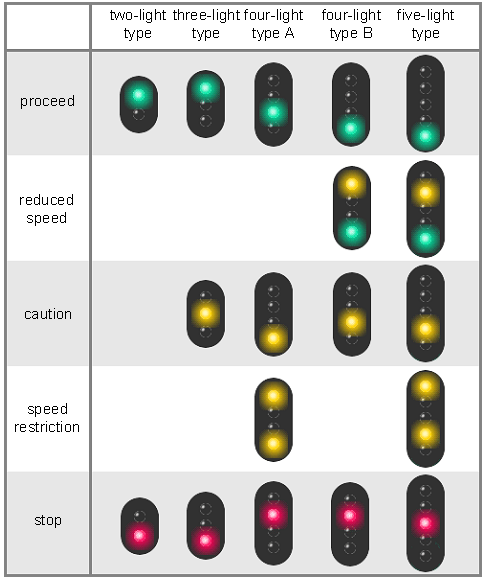 Image courtesy of Wikipedia user Tam0031 (License: CC-BY-SA 3.0)
All you really need to care about are the colors of the lights - there is no difference between the five different variants of the "proceed" aspect. They all mean you may proceed.
Side note: Google Translate often describes the green lights as "blue", because the Japanese language uses 青い to describe both of these colors.
The yellow-green, yellow and yellow-yellow aspects all require you to reduce your speed, but unfortunately the exact speed limits vary between lines. For example, on the Hankyū lines, yellow-green equals 65 km/h, yellow equals 45 km/h, and yellow-yellow equals 25 km/h. After a yellow or yellow-yellow signal you also have to expect the next signal to show "stop".
There is (usually) no advance warning for yellow-green or yellow signals, so you have to be watchful. Most Japanese trains have strong brakes, and the maximum speeds generally are very low, so this isn't a problem, even though such operating principles are generally restricted to subways in many other countries. However, when visibility is poor, there may be an additional repeater signal:
 Image courtesy of Wikipedia user "Majo statt Senf" (License: CC0)
If the repeater shows a diagonal line, the next signal will show green-yellow, yellow or yellow-yellow. The horizontal line means the next signal shows "stop" and the vertical line means the next signal is clear.
Speed limits are generally displayed as a sign with a number on it - these look different depending on the operator, but are generally self-explanatory. Sometimes there are two or even more different limits for different types of trains, with local trains having a limit of 5 to 15 km/h lower than express trains.
When there is a speed limit on the diverging branch of a switch, it is generally marked with a sign next to that switch - exactly how this is done also varies depending on the route but it's often marked with an arrow pointing in the direction of the switch.
One important point is that you do not get a clear advance warning for those speed limits. Signals in a station only tell you which route you will take, and you need to know (or be told by the HUD) what the appropriate speed limit is. There are a variety of ways in which this information can be conveyed.
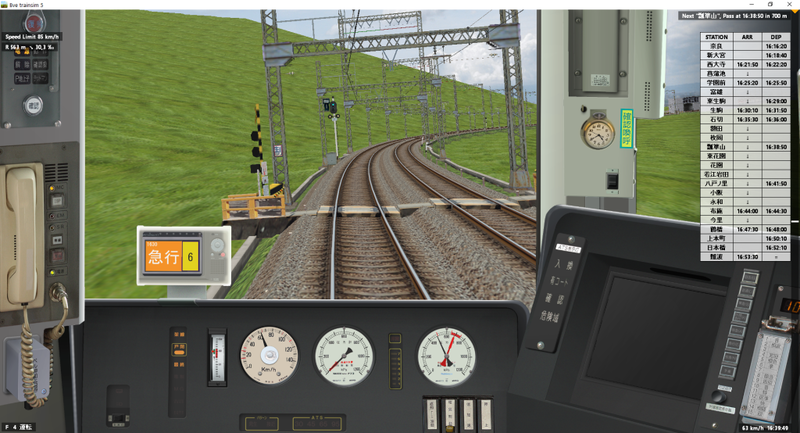
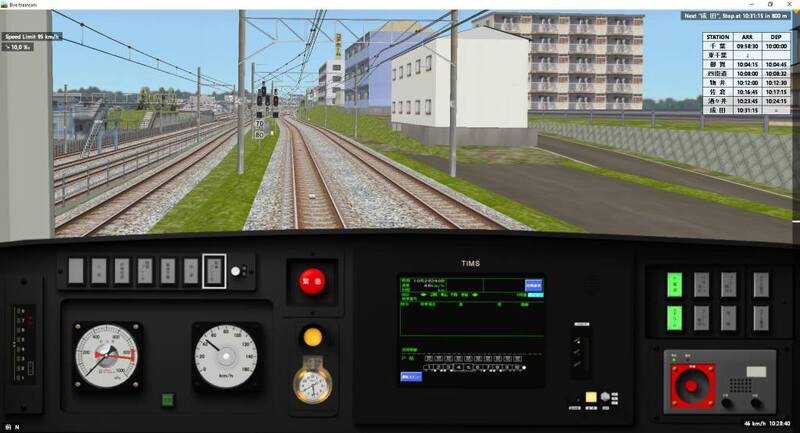 Approaching Narita: There are multiple signals. Each one of them represents a different route. Depending on which route is set, only one of them shows a "proceed" aspect - in this case, the second from the right. Generally, higher signals represent routes with higher speeds, and a signal on the right side represents a route to the right side (and vice versa). (Sobu & Narita Line)
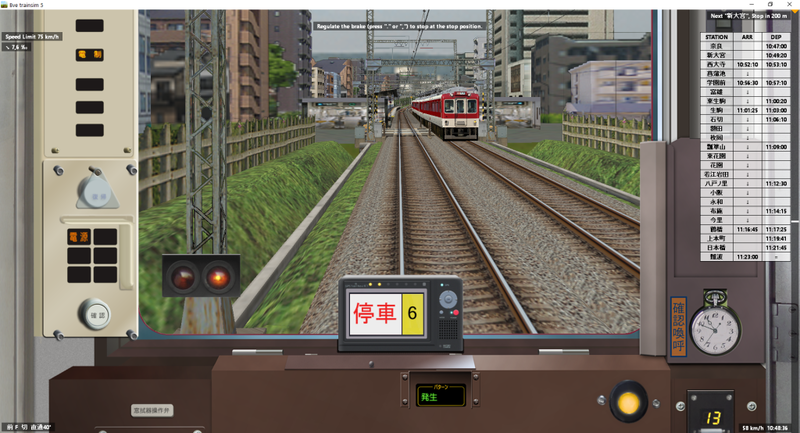
 The two white dots under the signal indicate we will go straight ahead. A single white dot would indicate a route in the corresponding direction. Similar indicators that show an arrow on a (very rough) dot-matrix also exist. (Kintetsu Nara Line)
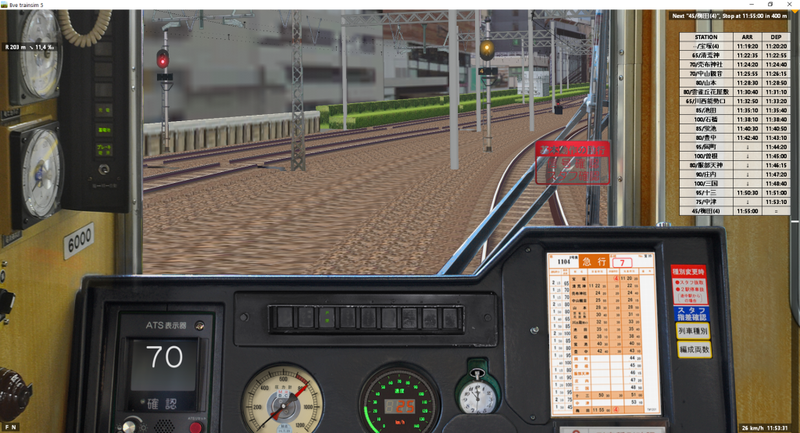 Approaching Osaka-Umeda: The number below the signal tells us we're going to track 4. (Hankyu Lines)
Automatic Train Stop (ATS)
Most routes with conventional signalling feature some kind of train protection system, which will intervene if you go past a red signal, exceed a speed limit, approach a red signal too fast or do other unsafe things. Just how much control those systems have, and how exactly they operate, varies between operators, routes and vehicles. Some variants are:
- ATS-S: The simplest variant, used on many low-traffic routes. When you're approaching a red signal, a loud bell will ring, at which point you need to immediately apply the brakes and acknowledge the warning (with SPACE or DELETE, depending on the vehicle). A chime will continue to ring out, so you don't forget about the signal. Once you've stopped in front of the signal, you can stop that chime with INSERT.
- ATS-P (Pattern): Used on many JR routes. The system knows about speed limits and signal states, and will intervene if you go too fast or approach a signal / speed threshold with too much confidence. First, you'll hear a warning chime, and then the emergency brakes will be applied until you've slowed down sufficiently. Note that you are not supposed to rely on this system, it does not necessarily know every speed limit, and it is only intended as a security layer which intervenes in case of an operator mistake.
- Other variants, like the ones used by Hankyū and Kintetsu, have a couple of speed thresholds (in the case of Kintetsu, 95km/h, 65km/h, 45km/h and 30km/h). When approaching a signal showing "stop" or a restricting aspect, these thresholds will kick in at certain points before the signal, so you need to be careful about braking in time.
If you get forcibly stopped by a train protection system, in many cases you need to set the reverser to neutral, apply the emergency brake (key "1"), and then press HOME (or another key depending on the exact vehicle - usually stated in the README or manual).
Don't forget that these systems often use balises for communication, meaning that the train only gets information about upcoming signals when it passes certain points. Thus, when a signal ahead switches to a less restrictive aspect (e. g. from "stop" to "clear"), the ATS might still enforce a braking curve until you pass the next balise, and the train receives information that the signal is no longer showing "stop".
Automatic Train Control (ATC)
On more important routes (ranging from the Shinkansen to the Tokyo Monorail), Automatic Train Control is installed. There are several different systems sharing that designation but in general they operate on similar principles:
- A marker next to the speedometer will show the current maximum speed.
- When you pass a section marker (a "virtual signal", if you will), that marker may be lowered to reduced speed and the train will automatically brake down. Before e. g. a tight curve, this will happen soon enough that the train will reach the appropriate reduced speed before it reaches the curve, usually with lots of room to spare.
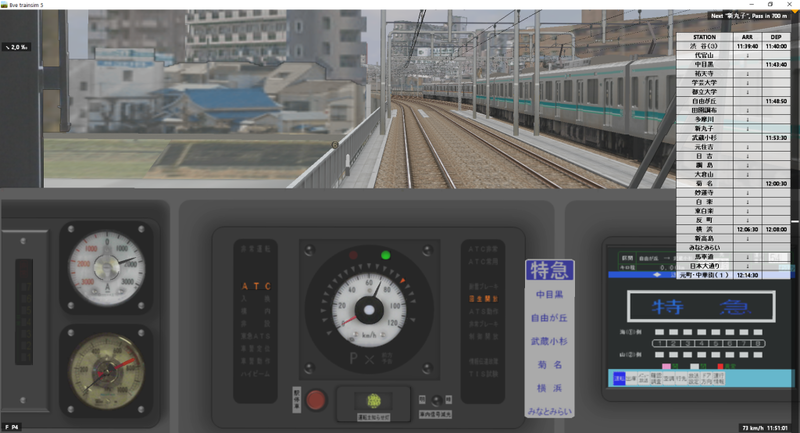
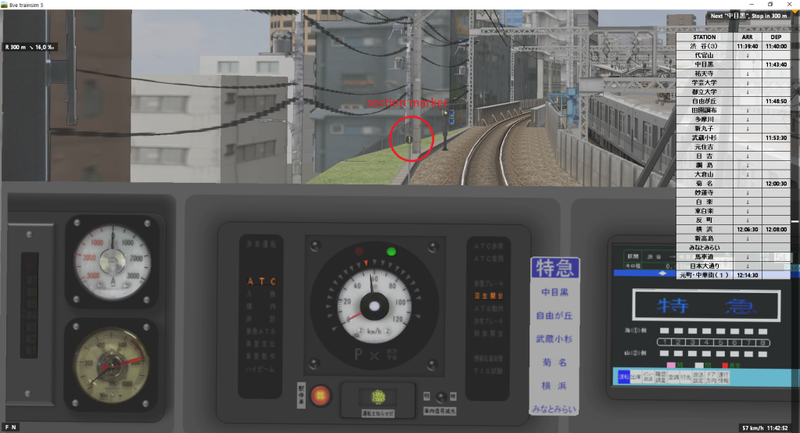 ATC in action (Tōkyū Tōyoko Line)
- When there is another train ahead of you, the speed limit will be gradually reduced several sections earlier, and will then eventually go down to 0 (or a red light shown next to the speedometer), indicating you need to stop before the next section marker. On some routes you need to brake down to 0 manually at the appropriate point, while obeying speed limits imposed by the Overrun Protection (ORP). For example, on the Tōkyū Tōyoko line, a "ORP 20km/h" sign and a "ORP 10km/h" sign will show shortly before the section marker, and if you are above the indicated speed, the ATC will very suddenly bring your train to a halt.
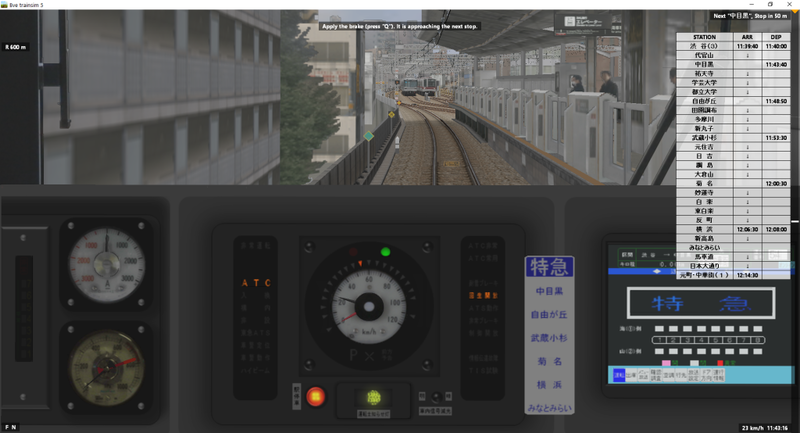 ORP 10km/h marker coming up, on the ground between the rails. Our ATC is showing a clear aspect (green light) so the ORP is not active, and we do not have to obey the 10km/h limit. (Tōkyū Tōyoko Line)
ATC is generally fairly intuitive and easy to operate and you will quickly get the hang of it.
Recommended routes & Add-Ons
Many other add-ons depend on Rock_On's JR vehicle package. I strongly recommend you install it before you install anything else. Download it here.
Whenever you're on a download page and feel lost, just look for a button or link saying ダウンロード (download).
Tōkyō Monorail
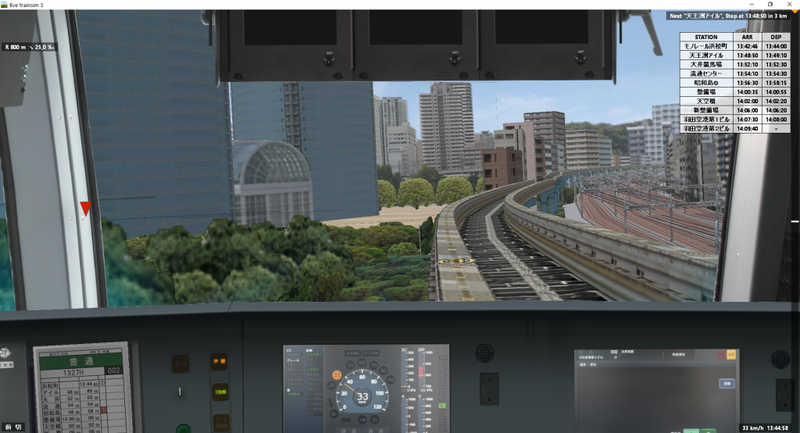
Tōkyō Monorail (東京モノレール) is operated by JR East and connects Haneda airport to Hamamatsuchō (浜松町) where interchange to several important JR lines is possible. The route is represented here in its entirety.
You can drive a local train (普通), section express (区間快速, operates as a local train on some parts of the route and as an express on others) or an express (快速, stopping only at Hamamatsucho and Haneda's terminals). This add-on represents two different eras, one from before the opening of Haneda International Terminal (with the building site for the new Monorail station visible) and one from after (with the monorail now taking a slightly different route in order to serve the new terminal).
Download the route here (click the link labelled "ダウンロード).
Download the appropriate vehicles here: 1000 Series and 10000 Series
Hiroshima Dentetsu Miyajima Line
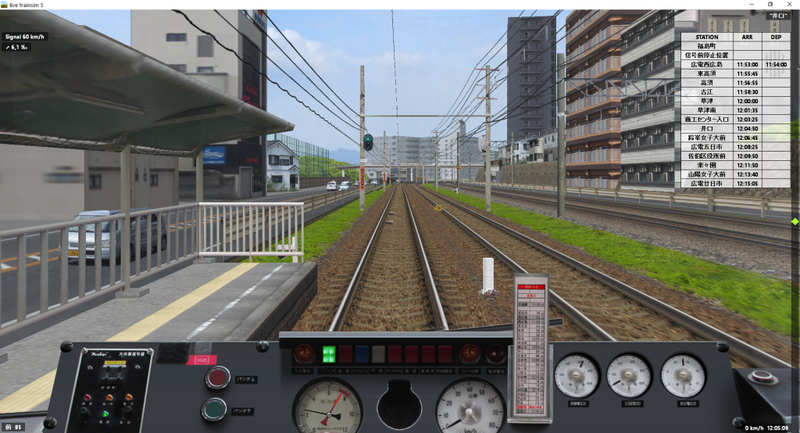
Hiroshima Dentetsu (Hiroden) operates Hiroshima's extensive tram network, although the route represented in this addon is actually classified as a railway. For much of the run, this line is more-or-less parallel to the San'yo line of JR West.
You will spend a lot of time waiting for passengers to board on some stations, making it very hard (or even impossible) to follow the timetable. Expect to be delayed by ~3 minutes at the end.
Download the route here (click the link labelled "ダウンロード).
Download the appropriate vehicles here: 3100 Series and 3950 Series
Kintetsu Nara Line & Ōsaka Line
Two very good lines from Japan's biggest private railway operator, Kintetsu. The Nara Line (not to be confused with the JR line of the same name) connects Nara to Ōsaka-Namba, featuring an impressive descent into the city of Ōsaka from a mountain range. The Ōsaka line is currently limited to the section from Yamato-Yagi to Aoyamachō and also features some very steep ramps.
The following download links use Google Translate because the site is fairly hard to navigate otherwise.
Download the 9020 Series train here
You can also find some helpful information on how to operate Kintetsu's ATS and other things on the above website.
Download a variety of Kintetsu trains by Code-T here
Tōkyū Tōyoko Line / Minatomirai Line
This very busy line connects Shibuya station in Tōkyō with Yokohama, and with the Minatomirai ("Harbor of the Future") district. Although this line is among the oldest add-ons mentioned in this list, it is still fairly impressive. Several other companies share this line with Tōkyū, and Tōkyū's trains also usually continue onto the Tōkyō Metro Fukotoshin Line at Shibuya, although only Tōkyū's own 5050 Series is actually driveable in this add-on.
Several stations feature platform-edge doors, requiring you to stop very precisely. This is made easier by the train's excellent braking system but still requires a bit of finesse and lots of focus to do consistently. I believe that in real life, TASC is installed on this route, automating those precise stops.
Important: You need to follow correct startup procedure! While the reverser is neutral and the emergency brake is applied, press "7" (not on numpad!) on the keyboard. A light labelled 東急 (Tōkyū) at the bottom of the panel will turn on. Only then, put the reverser in forward and release the brake. A bell will ring for a few seconds while the ATC initializes, and then the ATC indicators should become active (red or green light, plus triangular marker next to speedometer).
Download here (Link using Google Translate). 4 packages.
Hankyū Lines
This add-on represents Hankyū's three principal lines, the Kobe Line, Kyōto Line and Takarazuka Line, plus two branches, the Senri Line and Arashiyama Line, all in their entirety.
This network connects the three principal cities of the Keihanshin region, Kobe, Ōsaka and Kyōto, and will keep you busy with a variety of local and express trains for quite a while. Of particular note is the six-track section connecting Jūsō station with Ōsaka-Umeda, with the Kobe, Kyōto and Takarazuka Lines all running in parallel on the approach to their terminus. The Kyōto Line also runs parallel to the Tōkaidō Shinkansen for a bit, and you might be overtaken by a high-speed train.
The Senri line connects directly to the Ōsaka subway, and subway trains often continue on the Senri line. In fact, you can drive a subway service on this route yourself.
Download here. Google Translate does not work on this site! Scroll down to the section labelled "BVE5阪急線・リニューアル改訂版 Ver3.3 (2019.2.16)" (at time of writing, might change in the future) and click the button labelled "ダウンロード". Then, go to all the pages in the left sidebar that start with "阪急" (Hankyū), and download everything you can find on them (labelled "ダウンロード" as well), and the Osaka Metro 66 Series.
Also download these vehicles:
- Series 9300 (again, click the link labelled "ダウンロード")
- Series 5300, 6300, 7300 (two separate files)
- Series 3300 (click the link to 1drv.ms, all the way at the bottom)
If you forget (or can't find) one of these vehicles, at least the scenarios with other trains should still work fine.
JR Sōbu / Narita Line
This addon contains the Sōbu and Narita Lines' section from Chiba to Sawara - a double-tracked main line for the first 20-ish kilometers, which then continues as a somewhat slower single-track line. There's also the Narita Airport Line, connecting Narita Airport to Narita Station, running in parallel to Keisei's Narita Airport Line, which is in a different gauge, and the Kashima line. In short, it's a network of some routes that feel very distinct from one another, with a variety of services. An English version is available but doesn't get updated as often as the Japanese version, apparently.
Download the route here (JP, current version 5.9.1) or here (EN, current version 5.9.1). Also check the "Driving Guidance" tab for an in-depth explanation on the signalling system and the "Introduction" tab for a map. Hint: Pay very close attention to the Hazard Warning Indicators!
No comprehensive list of vehicles because I can't find all of them myself, but here are the ones I can:
Rock_On's train pack (see at beginning of section) is required.
A note on driving the Kashima Rinkai Tetsudō 6000 Series: When starting this vehicle, you need to put the reverser forward, then back in neutral, and then forward again. Only after that, the direction indicator on the panel (up arrow) will light up. If you do not do this, you will not be able to move the vehicle. Also read the section on operating railcars in this article.
If you happen to stall the vehicle, put the gear and reverser in neutral, open the throttle to P5, then repeatedly press the "5" key (not on numpad!) repeatedly. Then, close the throttle, put the reverser forward, the gear in low gear, and open the throttle again to proceed.
Notes on "missing" add-ons
This article will be amended in the future with additional add-ons, whenever I find new add-ons that are easy enough to install and worth the effort. There are several add-ons I have omitted, because a) they are very small, b) they require high effort to install (sadly, at the moment this category includes the excellent JR Kobe line) or c) are out-of-date or otherwise of very low visual quality. There are also most likely some very good add-ons which I simply do not know of.
Final notes
This guide is intended to be helpful, but I cannot guarantee its accuracy and I do not claim it is complete. If any info in this is out-of-date, especially if any of the links are broken, please comment and I will try to fix it.
I'd like to give a shout-out to Austin Huang, who wrote a similar guide, and also describes how to get BVE 5 running on a Mac.
All the add-ons mentioned and / or shown in screenshots are copyright of their respective authors. All Screenshots in this article were made by me.
I realize that it would be easier for you, the reader, if I directly linked to the add-on files, rather than the authors' websites. However, that would be both incredibly rude and in violation of copyright.
Any corrections or information on out-of-date information is welcome in the comments, as are links to add-ons not contained in the list.
The information in this guide is exclusively intended for the purposes of simulation; it is not to be used for the purposes of operating trains in real life.
Update history
2022-03-03: Edited the section "Installing add-ons" to reference my program "Locale Aware Unzip" as an alternative to Locale Emulator.
2020-12-11: Added section on diesel railcars and non-self-lapping brake valves, and some notes on the KRT 6000 in the Sōbu / Narita line section.


